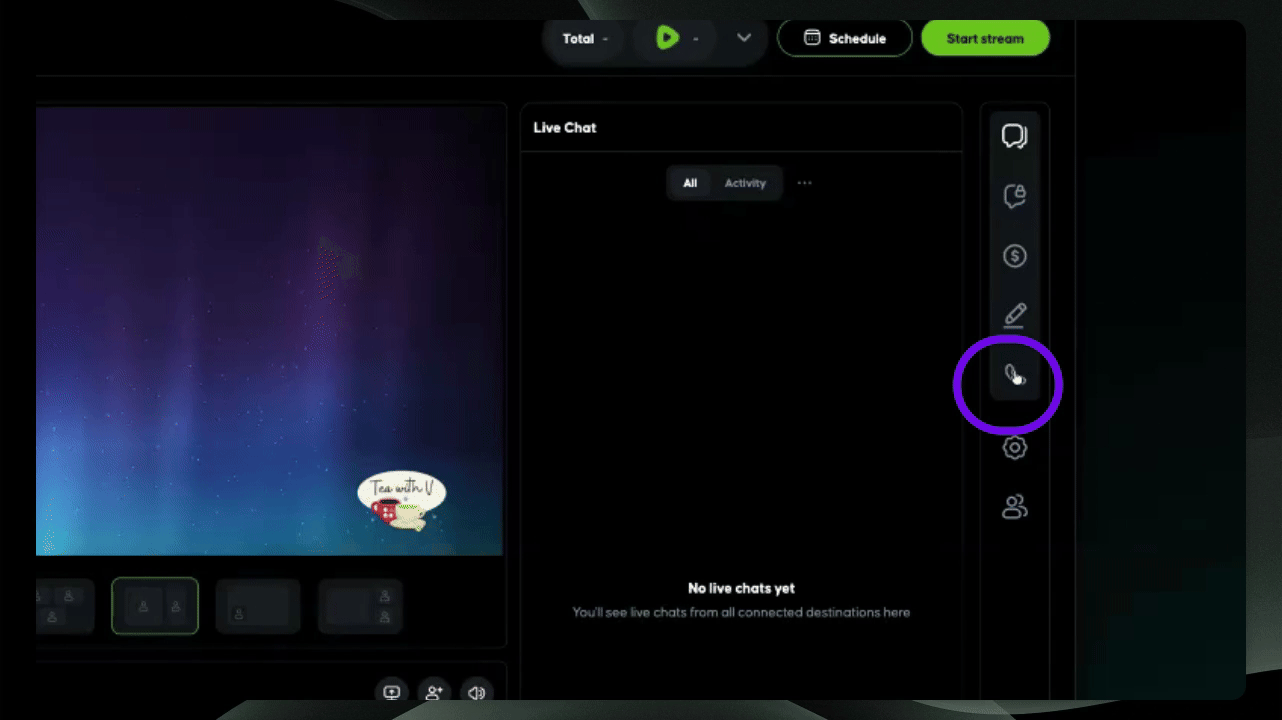
Step 1: Select Phone Icon
Open your canvas room. Toggle to the right-hand side of your toolbar and select the phone icon.
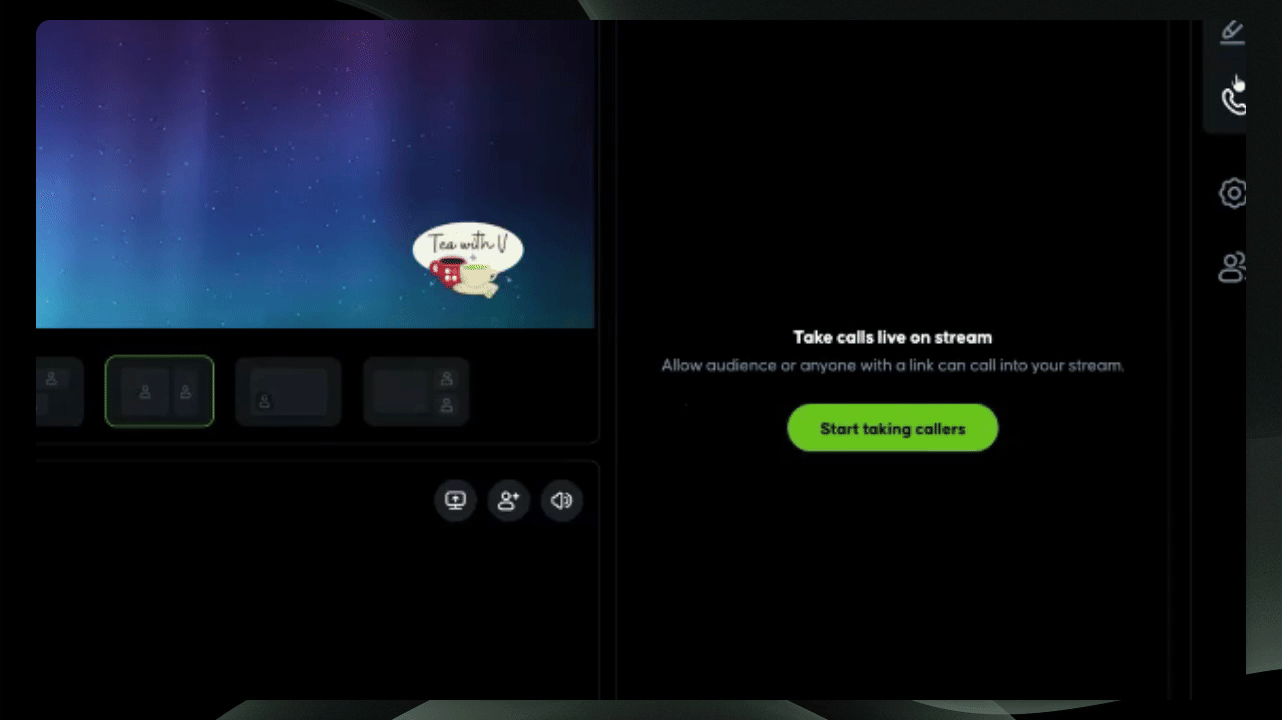
Step 2: Start Taking Callers
Click Start Taking Callers.
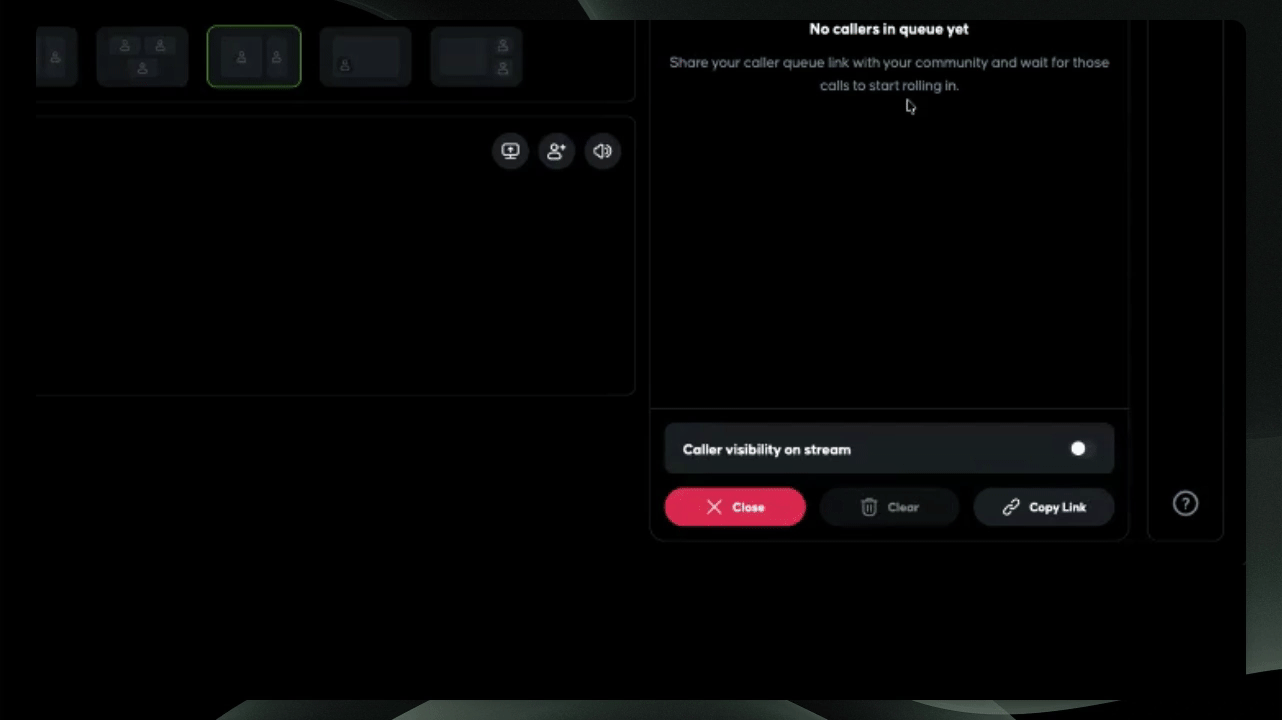
Step 3: Share Caller Link
Copy the link from the bottom-right corner of the Caller tab and share it with your audience.
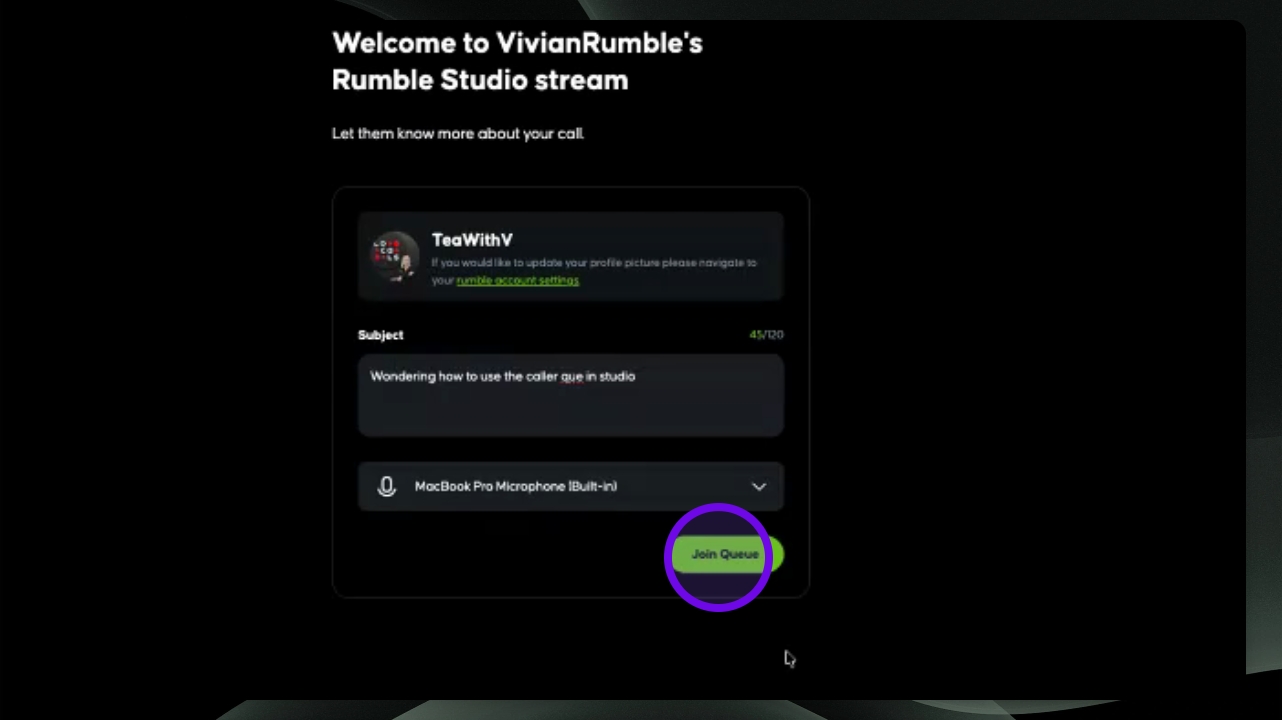
Step 4: Caller Guest
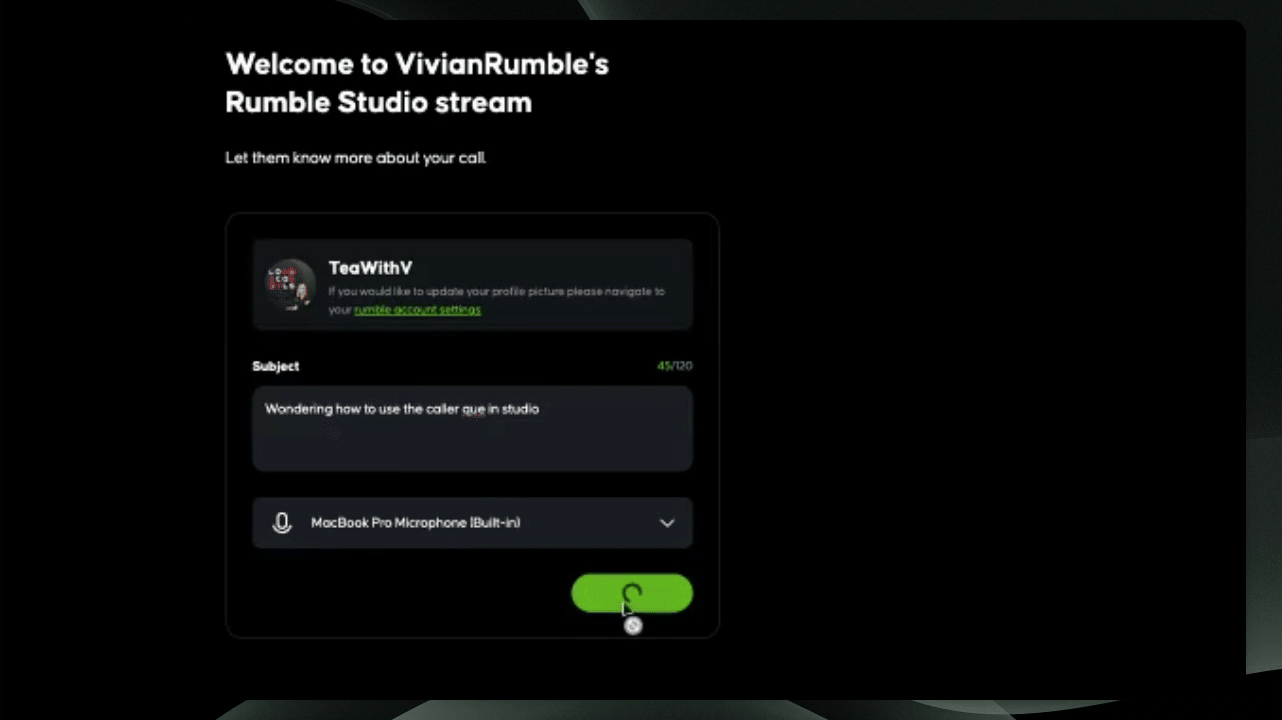
Your guests will be able to join the Caller Queue as long as they're signed in with their Rumble Account settings.

Step 5: Guest Joins Queue
Once ready to join as a guest, click Join Queue.
Step 7: Guest Test Microphone
Your guest can test your microphone to ensure the correct one is selected while they wait in the queue. If they need to adjust it, they can do so. Guests will be able to see their caller queue position while they wait.
Step 8: Manage Callers in Queue
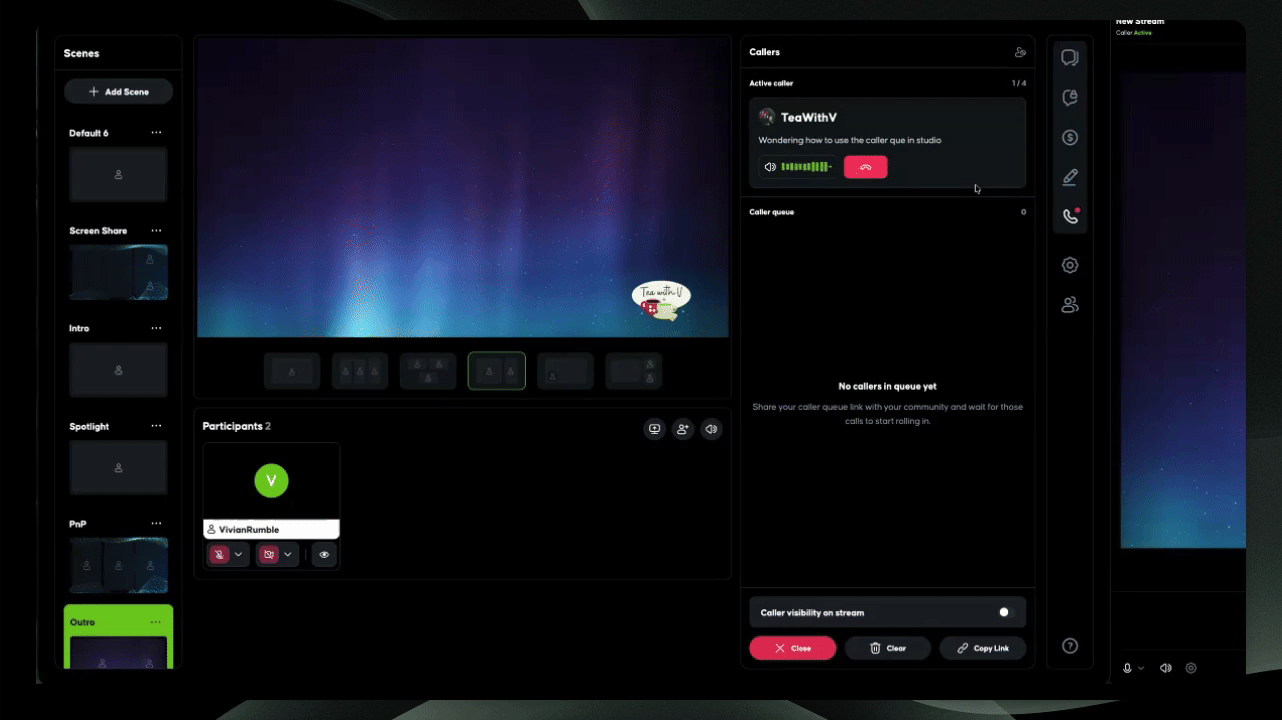
Once a guest joins the queue, you'll see it pop up in the caller queue tab in Rumble Studio. You can select the three dots to manage the caller: remove, ban, move up or down in the queue, or move them to the top.

Step 9: Accept Callers
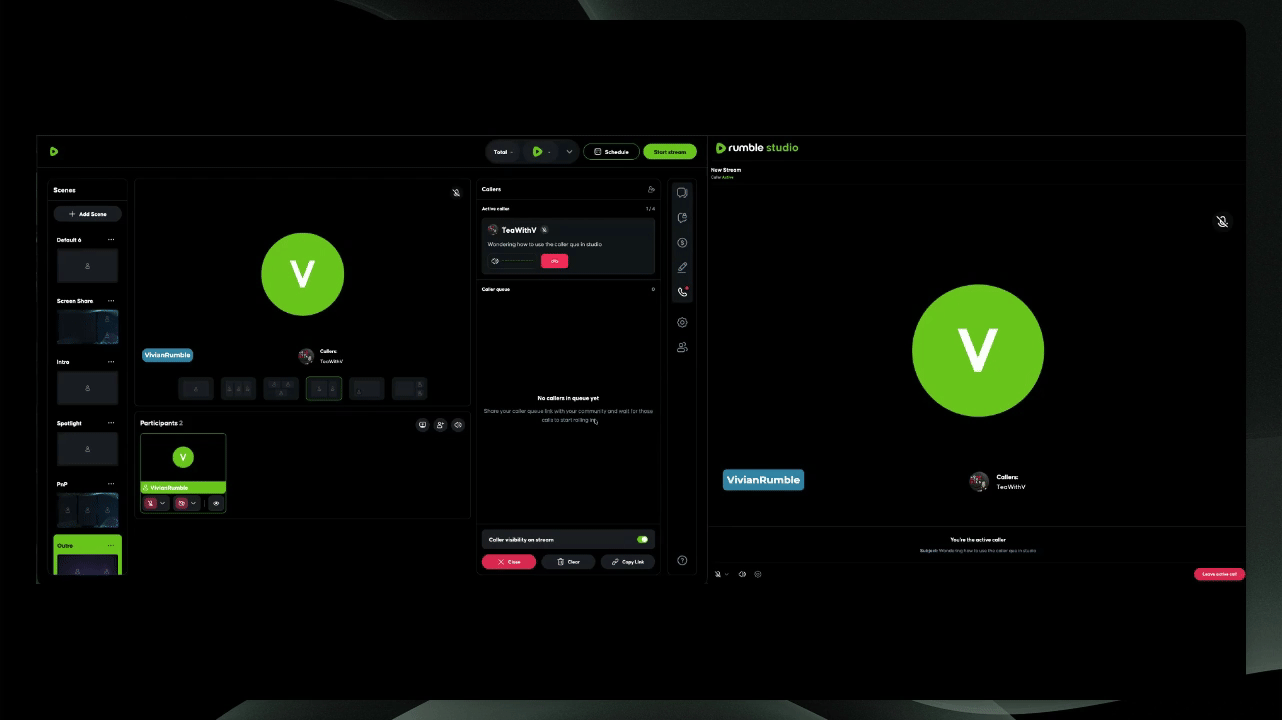
Accept the caller to add them to the queue. To display them on the screen, say Caller visible on screen. You can drag and drop to reposition where you'd like the caller to appear on the screen.
Step 10: Finish with Caller
Once done with a caller, you can hang up and take the next one waiting in the queue. You can have up to four active callers at one time.
Step 11: Close Caller Queue
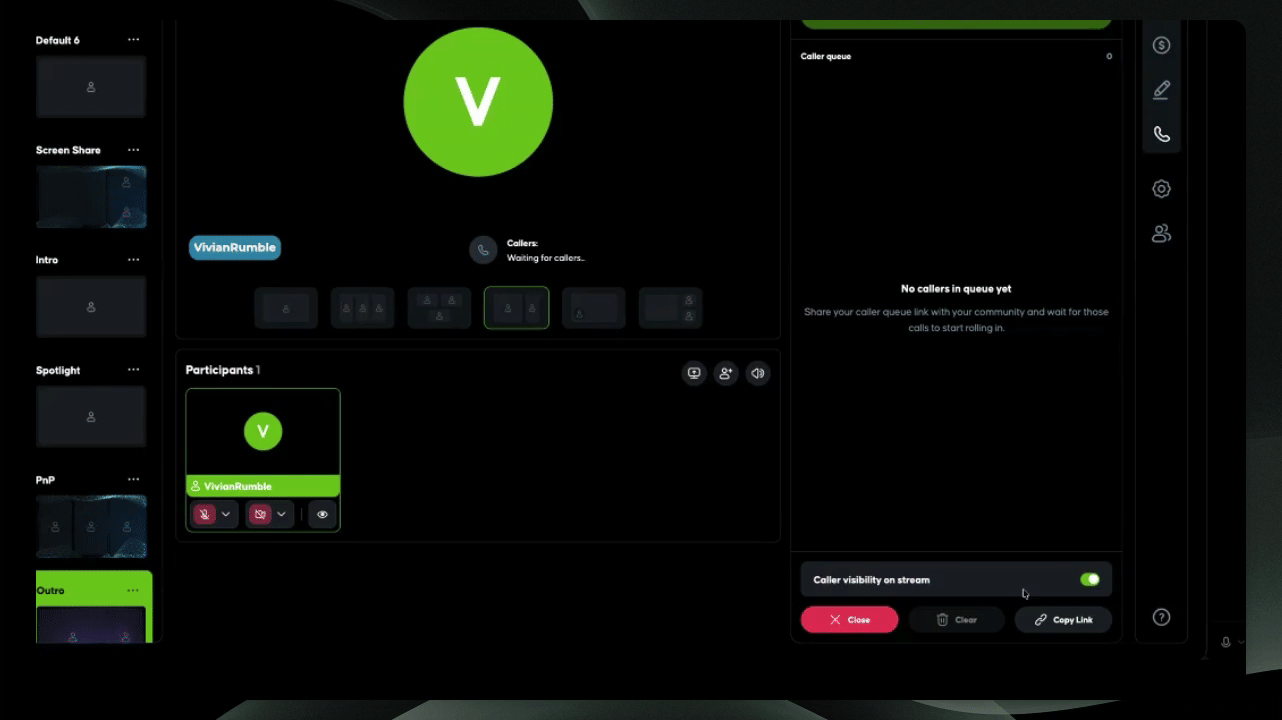
When done taking callers, click Close queue to close the caller queue and remove all remaining callers.
That's everything you need to know about using the new Caller Queue feature in Rumble Studio's new Canvas.